Quick Answer
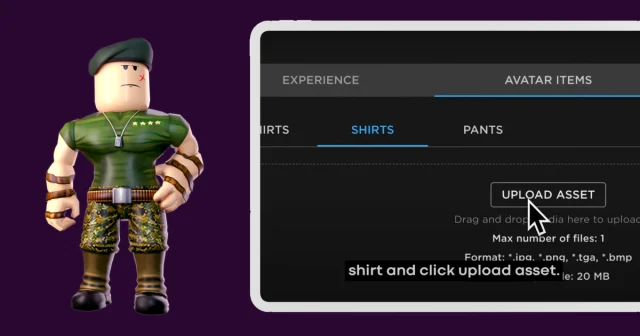
To build an Unreal Engine 5 character with AI, run the full chain in one place: clean the reference image, generate a mesh, texture it with PBR, rig it, and export an FBX. Customuse Nodes connects those steps on one canvas, then you prove the result by importing it into a real UE5 scene.
Watch the Video
This guide follows the Customuse walkthrough I Let CUSTOMUSE Build My Entire Character for Unreal Engine 5 - Here's What Happened, where a creator takes one reference image of a rusted humanoid robot all the way to a rigged FBX placed inside a UE5 warehouse scene.
The most useful AI character tools are not the ones that stop at a nice concept image. Unreal Engine creators need a chain: reference cleanup, pose preparation, mesh generation, texturing, rigging, export, import, material review, and scene testing. If the tool cannot carry a character through that chain, the artist still has to rebuild the workflow manually.
In the video, a creator starts with a single reference image of a rusted humanoid robot and uses Customuse Nodes to prepare the image, generate a mesh, create PBR textures, rig the character, export an FBX, and bring it into Unreal Engine 5.
The honest lesson is not that AI replaces every traditional character workflow. It does not. The lesson is that a node-based AI workspace can turn a reference into an engine-tested character candidate much faster than a fully manual first pass.
The real starting point is not the mesh
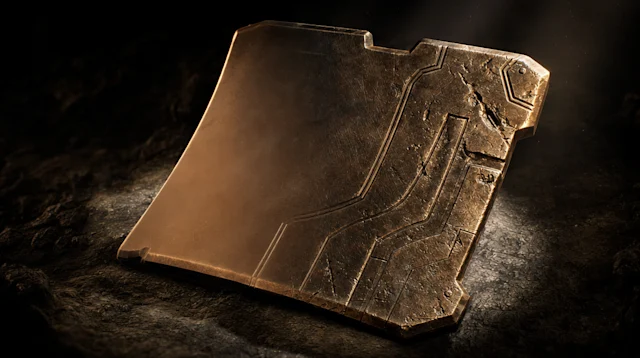
The walkthrough begins with a reference image that is not ideal for 3D generation. The robot is shown from a side angle, leaning against a wall, and includes an extra teddy bear detail that the creator does not want in the final character. That is a normal production problem. Concept images are rarely perfect 3D inputs.
In Customuse, the creator uses image-edit nodes to create a front-facing full-body view and remove unwanted details. This is exactly where a node workflow earns its keep. Instead of jumping between Photoshop, a generator, and a separate organizer, the prep work stays visible on the canvas.
For Unreal character creation, image prep should usually answer five questions:
Is the full body visible?
Is the pose usable for rigging?
Is the background clean?
Are unwanted props or occlusions removed?
Is the character centered with a clear silhouette?
The video then uses an "optimized for 3D" step to create a cleaner input, including a solid background, camera correction, centering, and an A-pose. That is not a glamorous step, but it may be the most important one. Better inputs tend to produce better downstream meshes.
It is worth understanding why this matters mechanically. Image-to-3D models infer geometry from what they can see, and they hallucinate the parts they cannot. A side-angle robot leaning against a wall hides one arm, foreshortens the legs, and bakes the wall shadow into the silhouette. Feed that in directly and the generator guesses the occluded limb, fuses the figure to the background, and treats the teddy bear as part of the body. Removing the prop and rebuilding a clean front-facing A-pose is not cosmetic polishing. It is removing ambiguity the generator would otherwise resolve incorrectly, and every minute spent here saves far more downstream cleanup.
Mesh generation is only one node in the graph
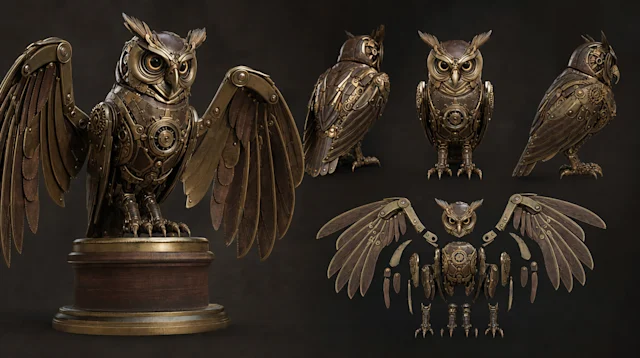
After image prep, the creator upscales the optimized reference and runs a mesh generation node powered by Tripo. The result is a detailed high-poly robot with armor plates, joints, and weathered surface information. For AI-generated work in a short timeframe, that is impressive.
But the video is careful about expectations. The topology is not hand-sculpted AAA topology, and the creator explicitly says Customuse will not replace a Substance Painter workflow for a top-tier hero asset under close scrutiny. That honesty matters. AI character creation is strongest when used as a fast pipeline for iteration, prototyping, indie production, visualization, or first-pass assets that will still be inspected.
For Unreal Engine creators, the question is not "is this identical to a senior character artist spending a week?" The better question is "does this get me to a testable rigged character in my scene fast enough to change how I prototype?"
There is also a practical topology note worth flagging for UE5. AI-generated high-poly meshes often arrive with triangulated, non-uniform topology and dense polycounts that are fine for a still render but heavy for a real-time character. If the robot is destined for gameplay rather than cinematic stills, plan for a retopology and LOD pass before it ships. The mesh node gets you a faithful starting shape quickly. It does not absolve you of the optimization work that any game-ready character needs.
PBR texturing and rigging make the workflow useful
The character becomes more valuable when it moves past geometry. In the video, the creator uses a mesh-to-texture node, feeds in the A-pose reference as a guide, and selects PBR mode. That creates material channels that can come into Unreal with less manual setup.
PBR mode is the detail that makes this Unreal-relevant rather than just a pretty preview. UE5's material system expects base color, normal, roughness, and metallic information, and a flat diffuse texture would look plastic under Lumen lighting. Generating those channels up front means the rusted, weathered surface of the robot actually reacts to light in engine instead of reading as a painted-on decal.
Then the creator runs a rigging node powered by Tripo. A rigged character can accept animation, motion capture, or Unreal's animation systems. This is where the workflow starts to feel relevant for game developers and previs artists. A static robot mesh is useful. A textured, rigged robot that can be dragged into UE5 and tested in a scene is much more useful.
That does not mean every rig will be final. Weighting, deformation, facial controls, hero animation requirements, and custom skeleton standards may still need manual work. If you plan to drive the character with Unreal's animation libraries, you will likely need to retarget the auto-generated skeleton onto a UE5 humanoid rig, and a non-standard joint hierarchy can make that retarget messier. But an automatic rig can be enough for blockouts, prototypes, pitch scenes, enemy variants, background characters, and rapid iteration where the goal is movement, not award-winning deformation.
Unreal Engine import is the real proof step
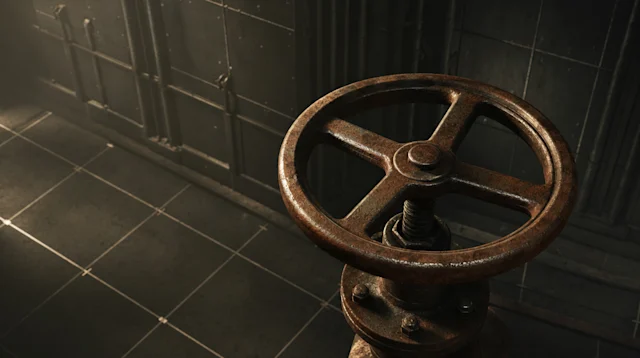
The final part of the video exports the FBX from Customuse, imports it into Unreal Engine 5, places it in a warehouse environment, and checks how the rusted robot reads under lighting. This is the correct way to judge an AI character. Do not stop at the generator preview.
Inside Unreal, inspect scale, material channels, silhouette, texture readability, and animation readiness. If the asset only looks good in the tool's viewer but fails in engine lighting, it is not ready. If the PBR channels come through and the character belongs in the scene, the workflow has done real production work.
For creators using UE5, the practical review loop should be:
Import the FBX.
Check scale against a known character or environment.
Inspect material slots and PBR maps.
Place the character in a real lighting setup.
Test a basic animation or retargeting path if the rig matters.
Decide whether the asset is final, prototype, or needs cleanup.
That label matters. Not every AI character has to be final. Sometimes the win is getting a convincing prototype in front of the team today instead of next week.
Where each step earns its place
It helps to be explicit about what each node in this workflow actually buys you, and where it stops. The table below maps the walkthrough steps to their realistic outcome for a UE5 pipeline.
Workflow step | What it produces | Where it is enough | Where you still need manual work |
|---|---|---|---|
Image prep / optimize for 3D | Clean front-facing A-pose, prop removed | Any downstream generation | Art-directed concept changes |
Mesh generation (Tripo) | Detailed high-poly shape | Prototypes, previs, blockouts | Retopology, LODs, hero topology |
PBR texturing | Base color, normal, roughness, metallic | First-pass engine-ready surfaces | Bespoke Substance hero materials |
Auto-rigging (Tripo) | Skinned skeleton, animatable | Enemies, NPCs, background, iteration | Facial rig, weighting cleanup, UE5 retarget |
FBX export + UE5 import | Engine-testable character | Scene tests, pitch, prototyping | Final optimization and polish |
The honest read of that table is that Customuse compresses the front half of the character pipeline dramatically and leaves the polish half to artists. That is the right division of labor, not a shortcoming.
How this compares to other paths
Unreal creators have more than one way to get a character into a scene. None of these is strictly best. They serve different goals, and a fair comparison should say so.
Approach | Speed to engine | Control over result | Best fit |
|---|---|---|---|
Customuse Nodes workflow | Fast | Medium-high (each step is a rerunnable node) | Concept-to-engine prototyping, indie pipelines |
Single AI generator (mesh only) | Fast | Low (no prep/rig/texture chain) | One-off mesh, no animation needs |
MetaHuman / Character Creator | Medium | High for humans, low for non-humans | Realistic human characters in UE5 |
Full manual sculpt + rig | Slow | Highest | Hero assets under art-director scrutiny |
A single generator like a standalone Meshy or Tripo run can produce an excellent mesh faster than anything, and for a one-off prop or static mesh that may be all you need. MetaHuman is unmatched for realistic humans but is not built for a rusted non-humanoid robot. The Customuse difference is not that it wins every category. It is that it keeps prep, generation, texturing, rigging, and export connected so the whole character moves as one rerunnable graph.
Where Customuse is different from a single generator
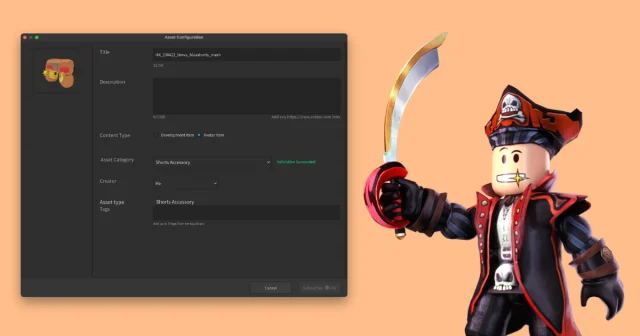
The video describes Customuse Nodes as a visual canvas where each step is connected. That is the larger product point. A single generator can create a mesh, but a production workflow needs memory and structure. You need to know which reference created the mesh, which edit removed the prop, which model generated the high-poly version, which image guided the texture, and which rigging step produced the export.
In Customuse, those steps sit in one graph. That makes the process easier to inspect, rerun, or change. If the pose is wrong, adjust the prep node. If the texture is weak, rerun the texture node with a better guide. If the mesh needs a different provider, change that step instead of rebuilding the entire pipeline. That rerunnability is the real production advantage, because character work is iterative and you rarely get the silhouette, surface, and rig right on the first pass.
That is why Customuse should be evaluated as an AI 3D workflow tool, not only an AI character generator.
Best use cases for this UE5 workflow
This workflow is strongest for solo creators, indie teams, game prototypes, cinematic previs, fast enemy or NPC exploration, background characters, and concept-to-engine testing. It is less appropriate as a one-click replacement for a hero character that needs exact topology, bespoke materials, facial rigging, extensive deformation work, and strict art-director scrutiny.
That is not a weakness. It is the right boundary. AI character creation is most valuable when it compresses the distance between idea and engine. Customuse does that by connecting image prep, generation, texturing, rigging, and export in one visible workflow.
For Unreal Engine 5 creators, the best way to test it is simple: pick a character reference, run the full graph, import the FBX into a real UE5 scene, and judge the result in context. The engine is where the truth shows up.
FAQ
Can I make a character for Unreal Engine 5 with AI?
Yes. You can take a single reference image through image cleanup, mesh generation, PBR texturing, and auto-rigging, then export an FBX and import it into UE5. The workflow in the video does exactly this with a rusted robot, ending in a UE5 warehouse scene. Expect to do retopology and optimization for game-ready use.
Is an AI-generated character game-ready for Unreal out of the box?
Not for hero gameplay characters. AI meshes often arrive dense and triangulated, and auto-rigs may need retargeting onto a UE5 humanoid skeleton. They are ready enough for prototypes, NPCs, enemies, background characters, and previs. For shipping gameplay, plan a retopology, LOD, and rig cleanup pass.
What file format should I export for Unreal Engine 5 characters?
Export FBX for rigged, skinned characters, which is what the video uses. FBX carries the skeleton and skinning that UE5 needs for animation. For static props without a rig you can use other formats, but for an animatable character FBX is the reliable choice into Unreal.
Do I still need Substance Painter or Blender if I use AI?
For many prototype and indie cases, no. The Customuse chain produces PBR textures and a rig directly. But for hero assets under close scrutiny, you will still want Substance Painter for bespoke materials and Blender for retopology, weighting, and topology cleanup. AI compresses the first pass; artists finish it.