HomeLearnTutorialsHow to upload a 3D Shirt or Accessory to Roblox: a Step-by-Step Guide

Discover how to share your 3D Shirts, Pants and other 3D clothing from Customuse and use them for your Roblox Avatar. This guide will walk you through each step from saving your design in Customuse to wearing it on your Roblox Avatar.

Note that if you are creating a mask or a hat the process differs a little bit. Please follow this tutorial for those accessories!

You will need:

  1. A desktop device with Roblox Studio installed

  2. A Roblox account with age verified and at least 1 750 Robux. If you need Robux to get started, join our Discord server. You can participate in challenges there and if you win, we give away Robux as a prize!

Step 1: Saving your design in Customuse

Once you're satisfied with your outfit design in Customuse, the first step is to save it.

After clicking 'Save', give your design a unique name. Adding description is crucial as it makes your design more discoverable on and off the platform, increasing its visibility to the Customuse community.

Now you can share your creativity with others. Click 'Publish' to share your designs with the Customuse community. This is a great way to showcase your work and inspire others. After publishing you will see the Download button.

Pro users don't have to publish their designs to download them. Free users can only download published designs. You can find your private designs in the "Private" tab of your profile. The published designs are placed in the "Published" tab.

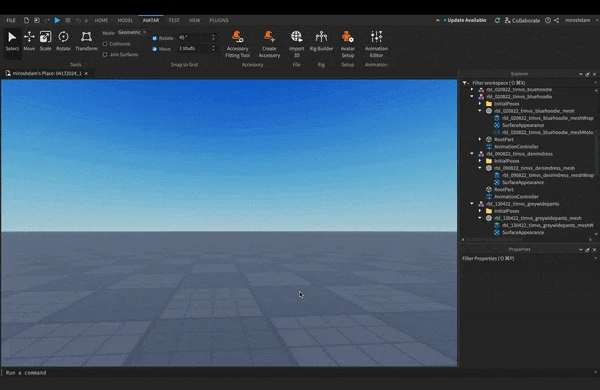
Step 2: Importing into Roblox Studio

When you download your design from Customuse, you receive a .FBX 3D model file. To import your asset into Roblox Studio please do the following:

  1. Open Roblox Studio (download it) and sign in with your Roblox account.

  2. Navigate to the Avatar tab and select Import 3D.

  3. In the file browser, select the .FBX file from the folder downloaded from Customuse. The 3D Importer loads a preview of the object.

Add a new Mesh to Roblox Studio to import it as a Roblox Accessory

See Roblox Studio tutorial for more details.

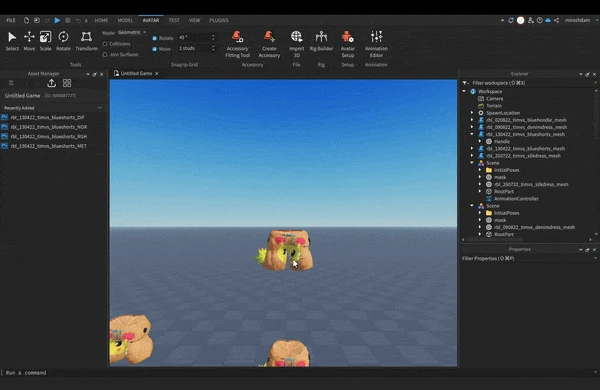
Step 3: Converting into Clothing or Accessories

We are almost done! The last step in the process of clothing creation requires you to use the Accessory Fitting Tool to convert this object to a standard Accessory that avatar characters can equip.

To generate the accessory object:

  1. In the Avatar tab, select the Accessory Fitting Tool. The Accessory Fitting Tool panel displays on the left side of the workspace.

  2. Select the Model of the clothing item in the viewport. The tool's text field populates with the name of the object selected. Alternatively, you can select the object within the Explorer window.

  3. On the Asset Type page, select the type of asset and the expected body type.

    1. Clothing includes Shirts, Sweaters, Pants etc. Accessories include Hats, Eyewear, etc.

    2. Body type is only important for Accessories and affects how accessories are applied. Read more in our Accessory guide.

  4. Test out various sample characters, clothing, and animations. See Testing Accessories for additional information.

    1. If the design does not behave as you expect, reach out to our team! We will help you.

  5. When ready to generate your accessory, click Generate MeshPart Accessory. This generates a copy of your Accessory which can be published to Roblox.

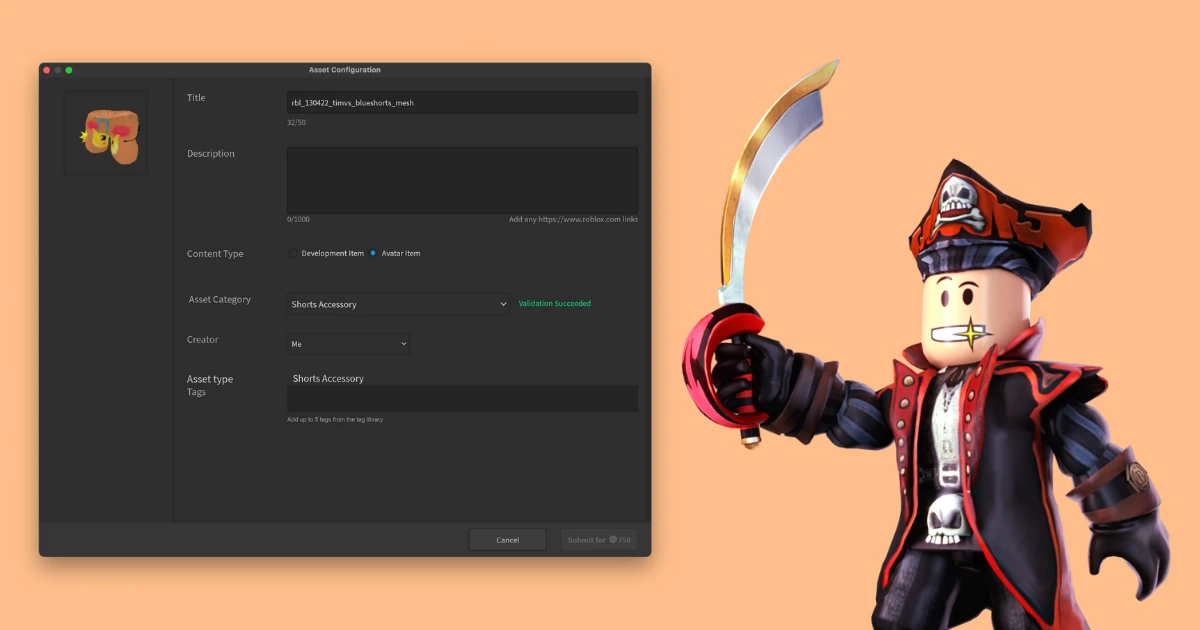
Step 4: Publishing to Roblox

Finally, your item is ready. Find it in the Explorer, right-click on it and select "Save to Roblox"

A GIF tutorial describing how to save your Roblox Accessory to Roblox

You will need to verify your age on Roblox

Then enter the details and press Upload! You will have to pay 750 Robux per each piece of Clothing or Accessory uploaded

Wait for your item to pass Roblox moderation and then you can put it on sale on the Roblox website. Note that you will have to pay a Publishing Advance to publish!


More Blog posts

How to upload a Hat or Mask to Roblox: a Step-by-Step Guide

How to upload a Hat or Mask to Roblox: a Step-by-Step Guide

Discover how to create Hats and Masks in Customuse for Roblox (Rigid Accessories in Roblox lingvo) and how to upload and use them on your Roblox avatar. In this guide you will go through the process from creating a Hat to wearing it on your Roblox Avatar.

How to Change Your Skin Color in Zepeto? (2024)

How to Change Your Skin Color in Zepeto? (2024)

One of the many customization options available is changing your avatar's skin color. This feature allows you to represent yourself accurately or experiment with different looks. Let's walk through the simple steps to change your skin color in Zepeto.

Introducing Roblox UGC items, 3D editing and 3D accessories!

Introducing Roblox UGC items, 3D editing and 3D accessories!

We have finally released Roblox UGC designs, enabled 3D editing, added descriptions to designs and fixed numerous bugs. Hoorah!

How to Change a Skin in Minecraft (2024)

How to Change a Skin in Minecraft (2024)

Are you tired of your old Minecraft character and looking for a change? Let's see how to easily change your skin in Minecraft, including Minecraft Java Edition.

Delete your account

Delete your account

Learn how to delete your account from Customuse

Cancel your subscription

Cancel your subscription

Looking to leave Customuse? Learn how to cancel your subscription.

Request a refund

Request a refund

How to request a refund if you have purchased Customuse Pro by mistake

Native language support, new Roblox 2D accessories & much more!

Native language support, new Roblox 2D accessories & much more!

Customuse latest product update.

Upload Your Snapchat Lenses Using Lens Studio

Upload Your Snapchat Lenses Using Lens Studio

Create custom Snapchat lenses with Customuse: choose templates and save as a .zip with Lens Studio Project. Unarchive, update, and preview in Lens Studio, then link Snapchat to publish.

Create Minecraft Skins with Customuse

Create Minecraft Skins with Customuse

"Design custom Minecraft skins with Customuse: choose templates, save and download. Easily upload skins to Minecraft by accessing the 'Skins' tab, adding new skins, and applying them to your character for a personalized gaming experience.

Upload Your Designs on Zepeto?

Upload Your Designs on Zepeto?

Design and sell custom Zepeto outfits with Customuse. Easily select templates, customize with logos, colors, materials, and export for commercial use. Learn to upload both .png and .zepeto files to Zepeto Studio, set tags, prices, and publish for approval.

A Detailed Guide to Customuse Discover Page

A Detailed Guide to Customuse Discover Page

Master the art of creating Roblox shirts, integrating TikTok effects, and using Snapchat filters with our Customuse tutorial. Perfect for 3D designers and creators at all stages of their journey.

Upload Clothes in Roblox From Your Phone: Easy Step-by-Step Guide

Upload Clothes in Roblox From Your Phone: Easy Step-by-Step Guide

Learn how to upload Roblox outfits created with the Customuse app from your phone. Our guide covers saving templates, uploading to Roblox, and setting your designs for sale.

How to Upload a Shirt in Roblox: a Step-by-Step Guide

How to Upload a Shirt in Roblox: a Step-by-Step Guide

Learn how to bring your Customuse designs to life in Roblox. Our guide explains how to save, publish, and upload your unique outfits to Roblox, making your avatar stand out.

Mastering Advanced Design Techniques in Customuse for Exceptional 3D Creations

Mastering Advanced Design Techniques in Customuse for Exceptional 3D Creations

Elevate your 3D design skills with our guide on the advanced tools of Customuse. Learn to add personalized text, intricate paint details, and more for standout designs in Roblox.

How To Make Robux: Skaho's Roblox Rise - Turning Customuse Creations into Cold, Hard Robux!

How To Make Robux: Skaho's Roblox Rise - Turning Customuse Creations into Cold, Hard Robux!

Strap in for Skaho's rollercoaster journey from Customuse newbie to Roblox fashion mogul! Get the scoop on their creative exploits and learn how you too can dominate the Roblox clothing scene.

Roblox Outfit Customization with the Customuse Editor

Roblox Outfit Customization with the Customuse Editor

Unleash your creativity in Roblox with our comprehensive guide to the Customuse Editor. Master the art of designing unique Roblox shirts to craft standout avatars that capture your personal style.

Features

  1. Learn
  2. Tutorials
  3. Contributors
  4. Explore designs

About

  1. Careers
  2. Partnerships
  3. Contact us
  4. Press

Social

  1. Discord
  2. YouTube
  3. Tik Tok
  4. X (Twitter)

Free tools

  1. Roblox clothes preview
  2. Minecraft clothes preview
  3. Generate Roblox skins with text
  4. Generate Minecraft skins with text
  5. Minecraft skin maker
  6. Fortnite skin maker
© 2024 Customuse. All rights reserved.
DMCA protected
Can you spare a cookie?
Sharing your cookies helps us improve site functionality and optimize your experience.
Click here
to read our Privacy Policy.