Quick Answer
To prepare an AI 3D model for animation, first decide whether it needs to deform (a character or creature) or just move in pieces (a door, wheel, or prop). Then inspect the mesh for holes and intersections, retopologize problem areas into clean quad-based edge flow, set the model to a neutral A-pose or T-pose, fix scale to real-world units and freeze transforms, set pivots at the rotation points, separate parts that move independently, and assign clean material slots. Run a 10-minute movement test before rigging, and only export to FBX, GLB, or USD once the mesh deforms or rotates without collapsing.
The hard truth: a model can look flawless in a static preview and fall apart the moment a joint bends. Animation prep is the work of making the mesh survive motion.
Why AI Models Need Animation Prep
Most AI 3D generators optimize for one thing: a convincing silhouette from the angles you'll screenshot. That is appearance-first geometry. Animation is structure-first, and the two goals rarely align by accident.
A generated mesh is typically a single watertight shell built by a marching-cubes-style or implicit surface process. It has no concept of where an elbow should crease, no edge loops following muscle lines, and no separation between parts that need to move on their own. The triangle density is often uneven (dense where the model was detailed, sparse where it was smooth), which means deformation stretches some areas and pinches others.
For animation, you generally need:
Clean, mostly-quad topology with even density and loops that follow deformation lines.
Edge loops at joints (elbows, knees, knuckles, jaw, eyelids) so creases bend instead of tearing.
A neutral rest pose (A-pose or T-pose) with limbs away from the body so weights can be painted.
Correct scale and frozen transforms so the rig math behaves.
A sensible pivot at each object's rotation point.
Separated, named parts for anything with independent motion.
Clean material slots that stay attached as geometry deforms.
An export path the next tool can actually read.
When those pieces are missing, the animator inherits cleanup work instead of animation work. The fix is to do that triage up front, on a copy, with a clear decision about what kind of asset you actually have.
What You Need Before You Start
Before touching a single vertex, line up the basics:
A DCC tool for inspection and cleanup: Blender (free), Maya, or 3ds Max. You'll use it to check topology, reset transforms, and run movement tests.
The original generation context — the prompt, reference images, and which model produced it. If the mesh is unsalvageable, regenerating with better reference is often faster than repairing it.
The target engine or renderer — Unity, Unreal, a web viewer, or an offline render. This decides your polycount budget, export format, and whether you need LODs.
A clear motion spec. Does this thing walk, talk, open, spin, or just sway? You cannot judge "good enough" without knowing what it has to do.
A non-destructive copy. Always prep on a duplicate so you can fall back if a cleanup pass goes wrong.
Step-by-Step: Preparing an AI 3D Model for Animation
Step 1: Classify the asset (deform, mechanical, or static)
Not every animated asset needs the same prep, and over-preparing a prop wastes as much time as under-preparing a character. Sort the model into one of three buckets:
Deforming — characters, creatures, cloth, anything that bends. Needs clean topology, a rest pose, rigging, and skin weights.
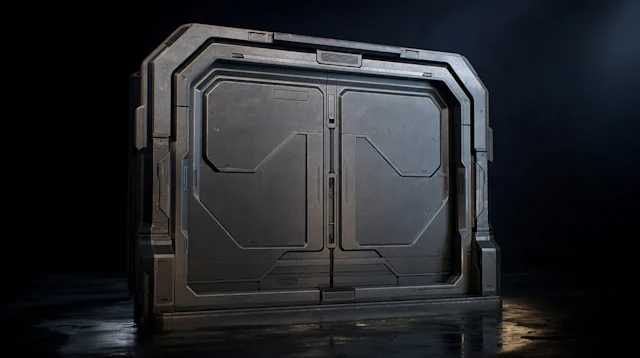
Mechanical — doors, wheels, turrets, pistons, drones. Needs separated parts, correct pivots, and parenting, but usually no skinning.
Static-with-motion — a floating collectible or a prop that only translates or rotates as a whole. Needs only a pivot and frozen transforms.
This single decision determines everything downstream. Get it wrong and you'll either rig a coffee mug or send a broken dragon into a skinning tool.
Step 2: Inspect and repair the mesh
Open the model and audit the raw geometry before you commit to it:
Look for non-manifold edges, holes, and internal faces hidden inside the shell.
Check for flipped normals (surfaces that render dark or inside-out).
Find self-intersections where an arm clips into a torso or fingers fuse together.
Note uneven triangle density and areas of degenerate or zero-area faces.
Heal small problems with merge-by-distance, fill-hole, and recalculate-normals. If the mesh is riddled with intersections or fused limbs, flag it now — that asset is a retopology or regeneration candidate, not a quick fix.
Step 3: Retopologize the deformation zones
For deforming assets, this is the step that decides whether animation succeeds. Triangle soup does not bend predictably. You want quad-dominant topology with edge loops that wrap around joints and follow the form.
You don't always need a full manual retopo. Options, roughly in order of speed:
Auto-retopology (Blender's QuadriFlow, Maya's Remesh, or AI retopology in a production pipeline) for a fast, even quad base — good for background characters and props.
Targeted manual loops added at elbows, knees, shoulders, and the face where auto-retopo isn't dense enough.
Full manual retopology for hero characters and faces that need precise loop flow.
Keep deformation areas denser than flat panels, and make sure loops run *across* the bend, not parallel to it. See What Is Retopology? for the loop-flow rules in depth.
Step 4: Set a clean rest pose
A character generated mid-action is nearly impossible to rig. Move the model into a neutral A-pose (arms ~45 degrees down) or T-pose (arms straight out). The A-pose is generally kinder to shoulder deformation. Limbs should be clear of the body, fingers slightly spread, and the mesh symmetrical along the world axis if the character is symmetrical. This gives the rigger room to place joints and the skinning tool clean separation to paint weights.
Step 5: Fix scale, orientation, and transforms
Animation rigs assume consistent units. AI models frequently export at arbitrary scale and orientation. Do three things:
Scale to real-world units — a human roughly 1.7–1.8 m tall, matched to your engine's unit (Unreal uses centimeters, Unity uses meters).
Orient correctly — facing +Y or -Z per your pipeline, feet on the ground plane, up-axis matching your target (Y-up for glTF/Unity, Z-up for Blender working files).
Freeze/apply transforms so scale is 1,1,1 and rotation is zeroed, with the object's origin where it belongs. Un-applied scale is the single most common cause of rigs that explode on import.
Step 6: Separate and name moving parts
For mechanical assets, split the single fused mesh into the pieces that move: door from frame, wheel from chassis, blade from hilt. Give each part a clear, hierarchical name (turret_base, turret_barrel) so the rig and engine can reference them. Parent children to parents so a moving base carries its attachments.
Step 7: Set pivots at the rotation points
Objects rotate around their pivot, and a generated mesh almost always has its pivot at the world origin or the bounding-box center. Move each pivot to the real hinge: a door's pivot belongs at its hinge edge, a wheel's at its axle center, a lid's at its rear edge. Wrong pivots are the reason doors swing through walls and wheels wobble.
Step 8: Assign clean material slots
Generated models often bake everything into one material or one texture atlas. For animation that's usually fine visually, but make sure material assignments follow the separated parts and that UVs are intact, because stretched UVs flicker and shimmer once the surface moves. Keep one material slot per logical surface so you can swap, retexture, or adjust without breaking the deformation. For the maps you'll carry through, see What Are PBR Materials?.
Step 9: Rig (only if it deforms)
Static and simple-mechanical assets skip this entirely — they just need pivots and parenting. Deforming assets get a skeleton, joints placed inside the geometry at the rest pose, and skin weights painted so each vertex follows the right bone(s). This is its own discipline; What Is 3D Model Rigging? covers the joint and weighting fundamentals.
Step 10: Export into the animation pipeline
Only export after the mesh passes the movement test (next section). Pick the format that matches the destination:
Need | Best format | Notes |
|---|---|---|
Rigged characters into Maya/Max, game engines | FBX | Carries skeletons, skin weights, and animation; the production default |
Web, real-time, glTF pipelines | GLB | Compact, Y-up, PBR-friendly; good for viewers and Unity |
Studio interchange, USD pipelines | USD | Scene-level data, strong for VFX and large pipelines |
Static geometry only | OBJ | No rig or animation data; reference and mesh transfer only |
For the trade-offs in depth, see GLB vs FBX for AI 3D Assets.
Deforming vs Mechanical vs Static: Prep Requirements
The prep checklist changes completely depending on what the asset has to do. Use this to scope the work before you start:
Prep task | Static prop | Mechanical (parts move) | Deforming (character) |
|---|---|---|---|
Mesh repair (holes, normals) | Yes | Yes | Yes |
Clean quad topology | Optional | Around moving joints | Required |
Edge loops at joints | No | At hinges only | Required |
Neutral rest pose | No | No | Required (A/T-pose) |
Scale + frozen transforms | Yes | Yes | Yes |
Separated, named parts | No | Required | For accessories only |
Custom pivots | Single pivot | Per part | Handled by skeleton |
Skinning / rigging | No | No (parenting only) | Required |
Typical prep time | 5–15 min | 30–90 min | 2+ hours |
The takeaway: don't apply character-level requirements to a prop, and don't send a messy character into a skinning tool expecting it to work.
Animation Readiness Checklist
Run through this before you rig or hand off any generated model. Treat any "No" as a blocker for deforming assets.
Check | What good looks like |
|---|---|
Mesh integrity | No holes, flipped normals, or internal faces |
Topology | Quad-dominant, even density, loops following the form |
Joint loops | Enough loops at elbows, knees, knuckles, face |
Rest pose | Neutral A-pose or T-pose, limbs clear of body |
Scale | Real-world units, matched to target engine |
Transforms | Frozen: scale 1,1,1, rotation zeroed, origin correct |
Orientation | Correct facing and up-axis for the pipeline |
Parts | Independent movers separated and named |
Pivots | At the real rotation point, not the origin |
Materials | Clean slots, UVs intact, no stretching |
Export | FBX/GLB/USD chosen to match the destination |
The 10-Minute Movement Test
Before you invest in rigging or hand the asset to an animator, prove it can move. This catches expensive problems while they're still cheap to fix.
Rotate the whole object through 360 degrees and watch the silhouette — does it read from every angle, or only the generation angle?
Move it through its expected range (walk cycle distance, door swing, wheel rotation).
Bend the obvious joints. For a character, pose an elbow and knee 90 degrees with a quick test rig or even a lattice. For mechanical parts, rotate each piece on its pivot.
Watch the deformation zones. Do creases fold cleanly, or does geometry pinch, collapse, or tear?
Check the materials and UVs. Do textures stay put, or do they swim and flicker as the surface moves?
Estimate cleanup time. If fixing it costs more than regenerating with better reference, regenerate.
If the model fails here, it has told you its real role: a strong static prop, a concepting reference, or a regeneration candidate. That's a useful answer, not a failure.
Common Mistakes and How to Fix Them
AI-generated models fail animation prep in predictable ways. Here's how to recognize and fix each:
Mistake | Symptom | Fix |
|---|---|---|
Rigging triangle soup | Joints pinch and tear when bent | Retopologize the deformation zones first |
Skipping freeze transforms | Rig explodes or scales wildly on import | Apply scale (1,1,1) and rotation before rigging |
Mid-action generation | Cannot place a skeleton cleanly | Repose to a neutral A-pose or T-pose |
Fused parts | A door won't open independently | Separate the mesh into named pieces |
Origin-point pivots | Wheels and doors rotate around the wrong center | Move each pivot to its true hinge/axle |
One baked material | Can't retexture or swap a surface | Split into per-surface material slots |
Stretched UVs | Textures shimmer in motion | Re-unwrap or fix the UV islands |
Thin single-sided surfaces | Cloth or fins collapse when deformed | Add thickness or solidify before rigging |
Over-prepping a prop | Hours wasted rigging a static collectible | Classify first; props need pivots, not skeletons |
How to Verify the Result
You're done when the asset survives motion under realistic conditions, not just a static beauty shot. Confirm:
The mesh deforms or rotates through its full range with no pinching, tearing, or collapse.
Transforms are frozen and scale matches the target engine on import (no surprise resizing).
The rest pose imports cleanly and joints land where you placed them.
Textures and PBR maps track the surface without swimming or flickering.
Named parts and hierarchy survive the export round-trip into your engine.
The file opens in the destination tool without warnings about missing skin data or scale mismatches.
If it clears all six, it's ready for the animator. If it fails one, fix that item and re-run the relevant part of the movement test — don't push a half-passing asset downstream.
Where Workflow Tooling Helps
Animation readiness is fundamentally a workflow decision, not a single export setting. The cost of a bad call shows up two steps later, in the skinning tool or on the animator's timeline, which is the most expensive place to discover that a mesh was never going to deform.
This is where keeping the asset inside a connected workflow pays off. Customuse is an AI 3D production workspace that uses model providers like Meshy, Tripo, and Hunyuan as nodes in a larger graph, so the generated mesh stays attached to its prompt, reference images, intended motion, and review notes instead of becoming an orphaned file in a downloads folder. In the Node Editor, you can branch a model into a "needs deform" path and a "static prop" path, regenerate from the original reference when a mesh fails the movement test, and rerun a single step without restarting the whole pipeline. Real-time multiplayer means an animator and a modeler can review the same candidate on one canvas rather than emailing versions back and forth.
Customuse is not a rigging or animation tool, and it doesn't replace the topology, weighting, and motion work an artist does in Maya or Blender. Its role is earlier: helping teams send *better, clearly-classified candidates* into the animation pipeline, with the context that explains why this version was approved. For how that fits the broader sequence from generation to engine, see the AI 3D Asset Pipeline.
Related Guides
FAQ
Can AI-generated 3D models be animated?
Yes. Many can be animated successfully, but most need preparation first. The deciding factors are topology (does the mesh bend cleanly?), a neutral rest pose, correct scale and frozen transforms, and whether moving parts are separated. Simple props animate with almost no prep; characters usually need retopology and rigging before they'll deform without tearing.
What is the biggest animation risk with AI models?
Bad deformation from messy topology. Generators build appearance-first geometry with uneven triangle density and no edge loops at joints, so when an elbow or knee bends, the surface pinches, collapses, or tears. The second biggest risk is un-applied scale, which makes rigs behave unpredictably on import. Both are caught early by retopologizing deformation zones and freezing transforms.
Do all AI 3D models need rigging before animation?
No. Only deforming assets — characters, creatures, and flexible objects — need a skeleton and skin weights. Mechanical assets like doors and wheels just need separated parts, correct pivots, and parenting. Static props that only translate or rotate as a whole need nothing more than a clean pivot and frozen transforms. Classify the asset first so you don't rig something that never needed it.
What should I check first on an AI 3D model?
Classify it: is it static, mechanical, or deforming? That single decision determines the entire prep checklist. After that, inspect the raw mesh for holes, flipped normals, and self-intersections, because a model with fused limbs or broken geometry is usually a retopology or regeneration candidate rather than a quick cleanup.
Should I retopologize an AI model or just regenerate it?
Run the 10-minute movement test and estimate cleanup time. If the mesh has good proportions and only needs better edge flow, retopologize — auto-retopology gives a fast quad base, and you add manual loops at the joints. If limbs are fused, the pose is locked mid-action, or intersections are everywhere, regenerating from better reference images is often faster than repairing. Keeping the original prompt and reference attached to the asset makes that regeneration quick.
What is the best export format for animated AI 3D models?
FBX is the production default for rigged characters because it carries skeletons, skin weights, and animation into Maya, 3ds Max, Unity, and Unreal. Use GLB for web, real-time, and glTF pipelines where a compact Y-up file matters. Use USD for studio interchange and VFX pipelines. Avoid OBJ for anything animated — it stores only static geometry with no rig or animation data.