HomeLearnTutorialsHow To Make Roblox UGC Designs Using Customuse

Roblox UGC (User-Generated Content) is open to everyone! If you've ever dreamed of creating unique items in Roblox and earning Robux without using complex software customuse is the best way to do so!

video

In this article, we'll walk you through creating a simple UGC item using Customuse, a user-friendly platform designed for creators of all skill levels. By the end, you'll also learn how to make a 3D render of your UGC item, perfect for sharing on social media.

Getting Started: Creating Your UGC Model
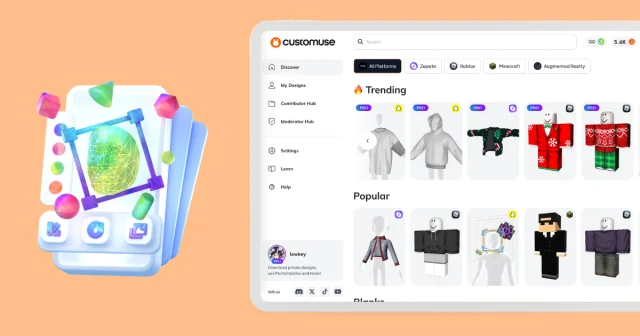
1. Go to Customuse

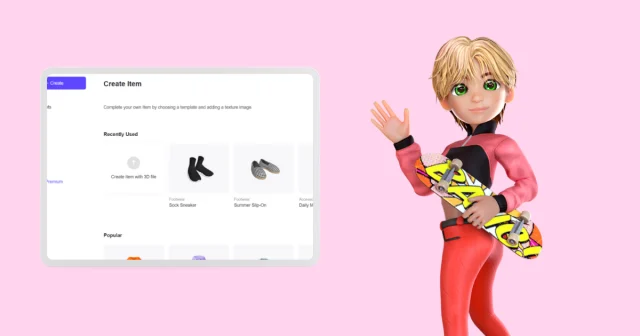
Begin by creating an account on Customuse using the website or the Customuse mobile app. On Customuse, you need to create an account. Once you've created an account, find the "Roblox 3D" category. This will allow you to choose from various 3D templates that you can customize to your liking.

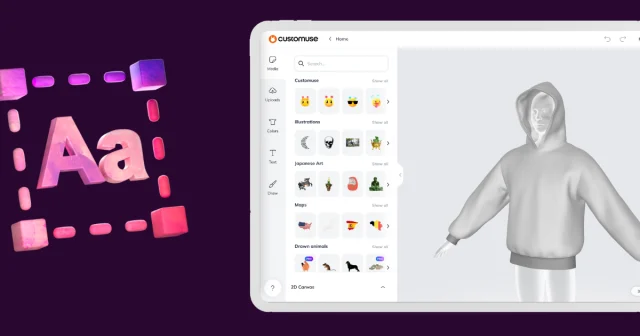
2. Choose and Customize a Template

After selecting a template, you'll be able to modify it in many ways. Start by adjusting the colors and adding using the tab on the right side. Select a layer of textures to personalize the model. You can also use the ‘Edit 3D’ tab where you can find sliders to tweak the proportions of the model, changing its shape to suit your vision. You can then customise it

Add 3D elements

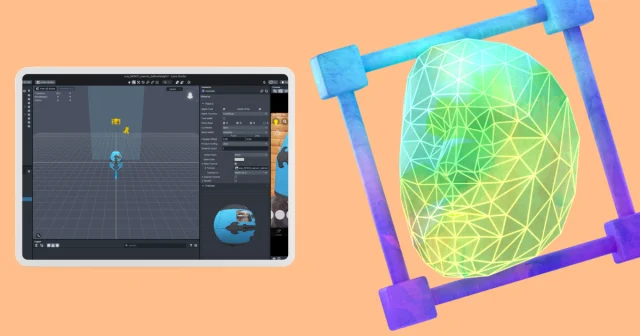
Customuse has a large and growing collection of 3D elements that you can add to your Roblox UGC designs. Each 3D element can be placed anywhere in the scene, just make sure it meets the requirements in Roblox Studio. All 3D elements in Customuse are recolorable and their shape can be modified. To do that just select a 3D element you want to edit and use the tab on the right.

To help you stay within the polygon limit on Roblox Customuse has a polygon count feature in Customuse. It will warn you when your design has too many details to be uploaded to Roblox.

Other than that the 3D elements can be rotated, scaled, copied and modified in any other way. Try it out!

Edit the shape of the design

Just like the 3D elements, the design itself can be modified. You can add puffiness or increase the sleeve length, make your avatar slimmer or do the opposite and make the clothes look baggy. Each design has unique parameters, be sure to check them all!

Edit texture

You can make all edits that you do with other designs in the Customuse editor. These include:

  • Incorporate Photos and Text

  • Add text

  • Draw on your model

  • Change colors

  • Change materials

Creating a 3D Render of Your UGC Item

Once you're satisfied with your design, it's time to create a 3D render. This step is essential for showcasing your creation on social media.

1. Share Your Model

Click on the "Share" button, then select "Share 3D Render." Here, you can choose whether you want to create a video or a photo. Customize the aspect ratio and background to your liking before proceeding.

2. Render and Download

The rendering process may take a few minutes, but once it's complete, you'll be able to download the video or image. This file can then be shared on your social media platforms, helping you promote your UGC item.

Uploading Your UGC Item to Roblox

Now that you've created and rendered your UGC item, it's time to upload it to Roblox! A short summary is below but be sure to check the detailed steps in Roblox UGC Clothing tutorial and Roblox UGC Accessory tutorial!

1. Download the Model Start by downloading the model from Customuse. Simply click the download icon and the model will be saved to your device automatically.

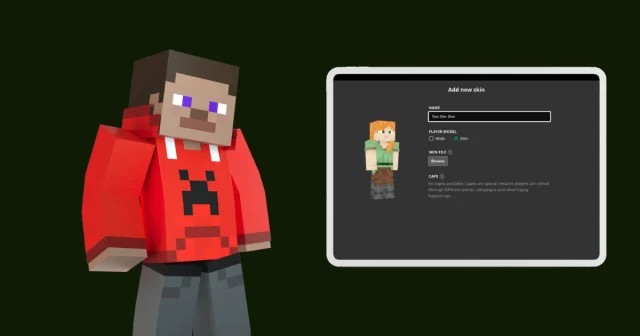
2. Import to Roblox Studio Open Roblox Studio and navigate to the Avatar tab. Select "Import 3D" and choose the .FBX file you downloaded from Customuse. The 3D Importer will generate a preview of your item—just click "Import" to proceed.

3. Fit and Test Your Accessory Before uploading, you need to ensure your accessory fits various Roblox body types. Use the ‘Accessory Fitting Tool.’ You can find this tool in the top bar under the ‘avatar’ category. Now select your model under the Avatar tab. Test the fit on different characters and animations, making any necessary adjustments.

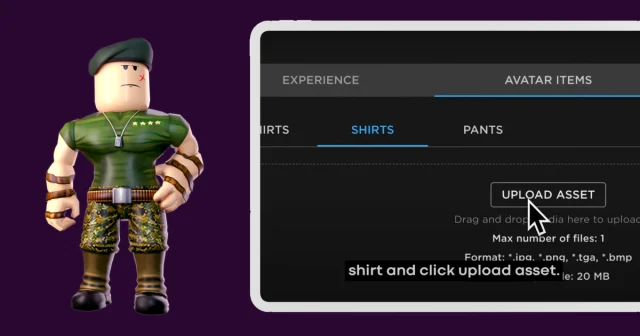
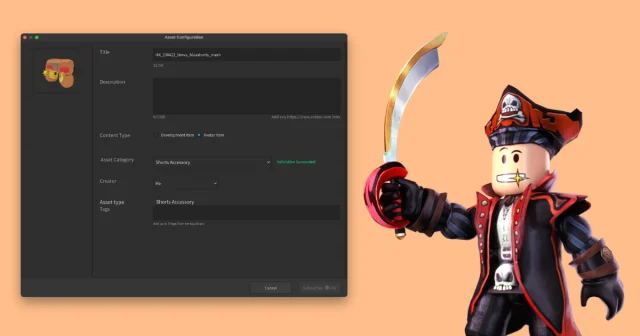
4. Generate and Publish Once your accessory is ready, click the "Generate MeshPart Accessory" button. This will create a copy of your accessory that can be published to Roblox. Right-click on the accessory and select "Publish to Roblox." A menu will appear where you can fill in the required details.

5. Final Steps and Requirements To upload your item, you must have ID verification on your account and a Roblox Premium subscription, which costs $10. Additionally, uploading your UGC item will cost 750 Robux. Once these requirements are met, submit your item and wait for Roblox moderation to approve it.

And that's it! You've successfully created and uploaded your own Roblox UGC item using Customuse. You can also put it up for sale but note the publishing advance you will have to pay (1 000 - 2 000 Robux). Once you are done with that, you can start earning Robux and sharing your unique creations with the Roblox community!


More Blog posts

How to create a Snapchat AR Lens on your phone using Customuse

How to create a Snapchat AR Lens on your phone using Customuse

Design your own Snapchar AR Lens on your phone using Customuse. This tutorial walks you through creating and publishing a Snapchat design on Customuse mobile app

How to create a TikTok Effect on your phone using Customuse

How to create a TikTok Effect on your phone using Customuse

Design your own TikTok Effect on your phone using Customuse. This tutorial walks you through designing your own TikTok Effect on your phone using the Customuse mobile app and publishing it to TikTok

How to upload Roblox Classic Clothing directly into Roblox from Customuse

How to upload Roblox Classic Clothing directly into Roblox from Customuse

Send Roblox Classic Clothing directly into Roblox without leaving the Customuse Editor. This tutorial will help you navigate it. Let's get started!

How to Upload a Shirt in Roblox: a Step-by-Step Guide

How to Upload a Shirt in Roblox: a Step-by-Step Guide

Bring your Customuse designs to life in Roblox. Our guide explains how to save, publish, and upload your unique outfits to Roblox, making your avatar stand out.

How to create Minecraft skins using Customuse web app

How to create Minecraft skins using Customuse web app

Design a Minecraft skin on the Customuse web app! This tutorial explains how it works

 How to Create AI Accessories for Your Roblox Designs

How to Create AI Accessories for Your Roblox Designs

Generate and add AI accessories to your Roblox design

How to create Minecraft skins using Customuse AI on your phone

How to create Minecraft skins using Customuse AI on your phone

Use your phone to design your Minecraft skins with AI! It is now simpler than ever, thanks to the AI capabilities of the Customuse app. With just a few clicks, you can generate unique skins tailored to your preferences. Here's how to do it:

How to Create Roblox Shirts & Pants Using Customuse AI

How to Create Roblox Shirts & Pants Using Customuse AI

Make Roblox designs with AI on Customuse website

How to Create Roblox Designs with Customuse AI On Your Phone

How to Create Roblox Designs with Customuse AI On Your Phone

Create a Roblox design with AI, edit it and upload to Roblox

How to create ZEPETO design without using complicated 3D software

How to create ZEPETO design without using complicated 3D software

Create a ZEPETO design on the Customuse website and upload it to ZEPETO. This tutorial walks you through the entire process of creating a ZEPETO design on Customuse and uploading and publishing it on ZEPETO!

How to create a TikTok Effect using Customuse

How to create a TikTok Effect using Customuse

Design your own TikTok Effect on the Customuse website. This tutorial walks you through designing and publishing your own TikTok Filter on TikTok using Customuse web app and TikTok Effect House

How to create an AR Lens for Snapchat using Customuse and Lens Studio

How to create an AR Lens for Snapchat using Customuse and Lens Studio

Design your own Snapchat AR Lens on the Customuse website. This tutorial walks you through designing and publishing your Snapchat custom AR lens using Customuse web app and Snapchat Lens Studio

How to create a ZEPETO design on your phone

How to create a ZEPETO design on your phone

Create your ZEPETO 3D design on your phone and upload to ZEPETO. This tutorial explains how

How to create Minecraft skins using Customuse AI on the Customuse website

How to create Minecraft skins using Customuse AI on the Customuse website

Use Customuse to quickly design a Minecraft skin with AI!

A Detailed Guide to Customuse Discover Page

A Detailed Guide to Customuse Discover Page

Master the art of creating Roblox shirts, integrating TikTok effects, and using Snapchat filters with our Customuse tutorial. Perfect for 3D designers and creators at all stages of their journey.

How to upload a Hat or Mask to Roblox: a Step-by-Step Guide

How to upload a Hat or Mask to Roblox: a Step-by-Step Guide

Discover how to create Hats and Masks in Customuse for Roblox (Rigid Accessories in Roblox lingvo) and how to upload and use them on your Roblox avatar. In this guide you will go through the process from creating a Hat to wearing it on your Roblox Avatar.

How to Change Your Skin Color in Zepeto? (2024)

How to Change Your Skin Color in Zepeto? (2024)

One of the many customization options available is changing your avatar's skin color. This feature allows you to represent yourself accurately or experiment with different looks. Let's walk through the simple steps to change your skin color in Zepeto.

Introducing Roblox UGC items, 3D editing and 3D accessories!

Introducing Roblox UGC items, 3D editing and 3D accessories!

We have finally released Roblox UGC designs, enabled 3D editing, added descriptions to designs and fixed numerous bugs. Hoorah!

How to upload a 3D Shirt or Accessory to Roblox: a Step-by-Step Guide

How to upload a 3D Shirt or Accessory to Roblox: a Step-by-Step Guide

Discover how to share your Roblox Clothes and Accessories from Customuse and use them for your Roblox Avatar. This guide will walk you through each step from saving your design in Customuse to wearing it on your Roblox Avatar.

How to Change a Skin in Minecraft (2024)

How to Change a Skin in Minecraft (2024)

Are you tired of your old Minecraft character and looking for a change? Let's see how to easily change your skin in Minecraft, including Minecraft Java Edition.

Delete your account

Delete your account

Learn how to delete your account from Customuse

Request a refund

Request a refund

How to request a refund if you have purchased Customuse Pro by mistake

Cancel your subscription

Cancel your subscription

Looking to leave Customuse? Learn how to cancel your subscription.

Native language support, new Roblox 2D accessories & much more!

Native language support, new Roblox 2D accessories & much more!

Customuse latest product update.

How to Upload Minecraft skins from Customuse

How to Upload Minecraft skins from Customuse

Design custom Minecraft skins with Customuse: choose templates, save and download. Easily upload skins to Minecraft by accessing the 'Skins' tab, adding new skins, and applying them to your character for a personalized gaming experience

Upload Your Snapchat Lenses Using Lens Studio

Upload Your Snapchat Lenses Using Lens Studio

How to upload your Snapchat Lens with Lens Studio and Customuse.

How to upload your designs to ZEPETO

How to upload your designs to ZEPETO

Design and sell custom Zepeto outfits with Customuse. Easily select templates, customize with logos, colors, materials, and export for commercial use. Learn to upload both .png and .zepeto files to Zepeto Studio, set tags, prices, and publish for approval.

How To Make Robux: Skaho's Roblox Rise - Turning Customuse Creations into Cold, Hard Robux!

How To Make Robux: Skaho's Roblox Rise - Turning Customuse Creations into Cold, Hard Robux!

Strap in for Skaho's rollercoaster journey from Customuse newbie to Roblox fashion mogul! Get the scoop on their creative exploits and learn how you too can dominate the Roblox clothing scene.

Upload Clothes in Roblox From Your Phone: Easy Step-by-Step Guide

Upload Clothes in Roblox From Your Phone: Easy Step-by-Step Guide

Learn how to upload Roblox outfits created with the Customuse app from your phone. Our guide covers saving templates, uploading to Roblox, and setting your designs for sale.

Mastering Advanced Design Techniques in Customuse for Exceptional 3D Creations

Mastering Advanced Design Techniques in Customuse for Exceptional 3D Creations

Elevate your 3D design skills with our guide on the advanced tools of Customuse. Learn to add personalized text, intricate paint details, and more for standout designs in Roblox.

Overview of The Customuse Editor

Overview of The Customuse Editor

Unleash your creativity in Roblox, TikTok and other platforms with our comprehensive guide to the Customuse Editor. Master the art of designing unique Roblox shirts to craft standout avatars that capture your personal style.

Features

  1. Learn
  2. Tutorials
  3. Contributors
  4. Explore designs

About

  1. Careers
  2. Partnerships
  3. Contact us
  4. Press

Social

  1. Discord
  2. YouTube
  3. Tik Tok
  4. X (Twitter)

Free tools

  1. Roblox clothes preview
  2. Minecraft clothes preview
  3. Generate Roblox skins with text
  4. Generate Minecraft skins with text
  5. Minecraft skin maker
  6. Fortnite skin maker
© 2024 Customuse. All rights reserved.
DMCA protected
Can you spare a cookie?
Sharing your cookies helps us improve site functionality and optimize your experience.
Click here
to read our Privacy Policy.