Quick Answer
A game-ready AI model is one that survives the engine, not just the download. Generate a concept, create clean multi-view images, build a high-poly mesh, retopologize to low-poly, then texture the optimized version. Export, import into Unity, fix pivots and colliders, rig if needed, and test in scene before shipping.
Watch the Video
This guide follows the Customuse walkthrough Making Game-Ready 3D Models with AI: From Concept to Final Asset, where the creator builds a six-wheeled Mars colony rover and an alien enemy, then drives and animates them inside a real Unity project.
"Game-ready" is one of the most abused phrases in AI 3D. A generated model is not game-ready just because it has a texture and can be downloaded. For a real game, the asset needs a workable mesh, sensible topology, usable materials, correct scale, engine compatibility, and, in many cases, pivots, colliders, rigging, or animation.
The video above uses Customuse to build a Mars rover and an alien enemy for a Unity game. The workflow includes concept generation, image optimization, multi-view creation, high-poly generation, retopology, low-poly texturing, Blender cleanup, Unity import, wheel physics, and character rigging. That is a more realistic standard than a one-click demo. The asset becomes useful only after it works in the game.
Start from the game's actual need
The video starts with a real design problem: the creator is building a Mars colony game and needs a rover that can transport resources. That context shapes the prompt. The rover is not a random sci-fi vehicle. It needs six wheels, a stylized realistic look, and a level of detail that fits the game.
This is how AI 3D should be used for production. Do not begin by asking for a "cool 3D model." Begin with the role in the game. Is it a drivable vehicle? A static prop? An enemy? A collectible? A background object? A hero asset? The answer changes the workflow.
For the rover, the important downstream requirement is wheel movement. That means the creator eventually has to separate or duplicate wheel geometry, fix pivots, add wheel colliders, and test the vehicle in Unity. AI can generate the starting asset, but the game behavior determines what has to happen next. The same logic applies before you type a single prompt: a 50,000-triangle hero rover that the player drives up close deserves different treatment than a distant background lander the player never approaches. Defining that budget early prevents over-detailing assets the engine will only ever show at a fraction of their resolution.
Concept generation is part of the asset pipeline
Inside Customuse, the creator creates a new workflow and prompts for a Mars colony rover. The first result is close, but the creator generates variations and chooses a cleaner direction. This is a strong use of AI: fast concept iteration before committing to 3D.
The workflow then optimizes the image by centering the object and putting it on a clean background. It also generates multiple views so the 3D model has more information than a single image can provide. For hard-surface objects like vehicles, multi-view input can help preserve form across sides. A single front-facing render leaves the generator guessing about the back and underside, which is exactly where a six-wheeled rover hides most of its mechanical detail. Feeding clean side and rear views reduces the amount of guesswork baked into the mesh.
This is where a node canvas becomes useful. The concept, variations, optimized view, multi-view images, high-poly model, retopology, and textures all remain connected. If one view is wrong, it can be regenerated without losing the whole pipeline. That connected graph is also what makes the workflow repeatable: once the rover is dialed in, the same node structure becomes a template for the next vehicle, so concept-to-asset time keeps dropping across a project rather than resetting with every model.
High-poly first, low-poly before texturing
One of the most useful production lessons in the video is order of operations. The creator first generates a high-poly model, then retopologizes it into a low-poly model, and only then generates the final texture. The creator notes that texturing after retopology produced a better result than texturing the original high-poly candidate.
That sequence is worth remembering:
Generate or prepare the concept.
Create clean views if needed.
Generate the high-poly mesh.
Retopologize into a low-poly model.
Texture the low-poly model.
Export and test in the engine.
The reason is simple. Games run on the final low-poly asset, not the source mesh. If you texture before the asset is optimized, you may create detail that does not transfer cleanly. By texturing the game-facing model, the result is closer to what the engine will actually use. It also keeps the door open for proper LODs and baked normal maps later: the high-poly mesh becomes a detail donor that bakes surface information onto the low-poly version, so the asset reads as detailed while staying cheap to render.
Stage-by-stage: what each step actually produces
It helps to see the whole pipeline as a chain where each stage has a clear input, a clear output, and a clear failure mode if you skip it. The table below maps the rover and alien workflow from the video against what each step is responsible for.
Stage | Input | Output | What it does for game-readiness |
|---|---|---|---|
Concept + variations | Prompt tied to the game's need | Chosen direction | Locks art direction before any 3D cost is spent |
Image optimization | Raw concept render | Centered, clean-background image | Removes background noise that confuses the generator |
Multi-view | Optimized concept | Front/side/rear views | Gives the mesh real form on every side |
High-poly generation | Multi-view images | Dense source mesh | Captures maximum surface detail |
Retopology | High-poly mesh | Clean low-poly mesh | Produces the budget-friendly mesh the engine ships |
Low-poly texturing | Retopologized mesh | PBR textures on game mesh | Bakes detail onto the asset the engine actually uses |
Engine handoff | Exported model | In-scene asset | Surfaces pivots, scale, collider, and rig issues |
Skipping any one of these does not just lower quality; it usually pushes a hidden cost downstream. Skip multi-view and the back of the rover invents itself. Skip retopology and your triangle budget explodes. Skip engine testing and you ship a model that looks fine in a viewer and breaks the moment it has to move.
Engine handoff reveals the real issues
After exporting the rover, the creator brings it into Blender, separates and duplicates the wheels, then imports the asset into Unity. The first test exposes a real production issue: the wheels rotate incorrectly because the pivots or axes are off. That is not an AI failure so much as a normal game-asset integration problem.
This is why "game-ready" should always include engine testing. A model can look good and still need pivot fixes, collider work, material adjustments, smoothing-angle changes, or hierarchy cleanup. In the video, the creator fixes the pivots, sets up wheel colliders, adds a dust particle system, and tests driving in the game.
That entire sequence is the difference between a downloadable model and a game asset. The pivot problem is especially instructive: AI generators have no concept of how a wheel should spin, because rotation lives in the object's transform hierarchy, not in the geometry. No amount of better generation fixes it. That is structural work a human or a tool with engine awareness has to do, and it is a useful reminder of where AI accelerates the job versus where it hands off.
Characters need their own review path
The video also creates an alien enemy for the Mars game. The workflow is similar at first: prompt, iterate, optimize, T-pose, generate views, create a high-poly model, retopologize, and texture. Then the character moves into Mixamo for rigging and animation before returning to Unity.
This is a good example of AI helping without pretending to solve everything. The generated enemy becomes useful because the creator adds a rig, tests animations, adjusts textures, and places the character in the project. The AI part compresses concept-to-model time. The game-development part still matters.
For characters, inspect topology around joints, texture readability, scale, rig compatibility, and animation deformation. A creature that looks good in a static pose may fail when it runs or attacks. Generating in a clean T-pose is what makes auto-rigging in a service like Mixamo viable at all; a model frozen in a dramatic action pose fights the rig and tears at the elbows and knees. The pose you generate is a downstream decision, not a cosmetic one.
A realistic definition of game-ready AI assets
For SEO and production purposes, a game-ready AI asset should meet a practical standard. It should be optimized enough for its role, textured in a way that survives engine lighting, exported in a usable format, and tested in the target engine. If it needs animation, physics, collision, or interaction, those requirements should be checked before calling it finished.
Customuse helps by connecting many steps that usually happen across separate tools: concept art, variations, 3D generation, retopology, texturing, and export. It also lets creators use model providers such as Tripo inside a broader workflow rather than treating a single generation as the whole job. The point is not that any single generator is best at every task; tools like Meshy and Tripo are genuinely strong at raw mesh generation, and Roblox's own built-in generation is convenient for items that live entirely inside Roblox. The advantage of a workflow surface is that those generations become one node in a longer, repeatable production chain instead of the finish line.
The video's rover and alien show the most credible version of AI 3D for games. It is not magic. It is acceleration. A creator can get from idea to usable in-engine candidate much faster, then spend their judgment on the remaining production details.
What to do before shipping an AI-generated game model
Before shipping, test the asset in the actual scene. Check scale against the player. Inspect material slots and texture maps. Review topology at the distance the player will see it. Confirm colliders and pivots if the object moves. For characters, test the rig and the key animations. For vehicles, test the wheels, suspension behavior, and collision.
If the asset passes those checks, AI has done real production work. If it does not, the workflow still saved time by getting you to a clear review point quickly. That is the honest value of AI 3D for game development: faster iteration, visible decisions, and a shorter path from concept to engine.
FAQ
What does game-ready actually mean for an AI 3D model?
It means the asset works inside your engine, not just inside a model viewer. That requires a reasonable triangle budget for its role, clean topology, usable PBR materials, correct scale, a supported export format, and any required pivots, colliders, rig, or animations. If it moves, interacts, or deforms, those behaviors must be tested in-scene before the asset counts as ready.
Can I just use AI-generated models in Unity without cleanup?
Sometimes for a static background prop, but rarely for anything that moves. In the video, the rover's wheels rotated incorrectly on first import because the pivots were off, and a character needs a rig before it can animate. AI compresses concept-to-model time, but pivots, colliders, scale, and rigging are integration work the engine still demands.
Should I texture before or after retopology?
After. Games render the final low-poly mesh, so texturing the optimized version produces results that transfer cleanly into the engine. The creator in the video explicitly found that texturing after retopology beat texturing the raw high-poly candidate. Keep the high-poly mesh around as a source for baking normal maps onto the low-poly version.
How do I make an AI-generated character animate without breaking?
Generate it in a clean T-pose so an auto-rigger like Mixamo can place a skeleton correctly, then check topology around the shoulders, elbows, hips, and knees where deformation is worst. Test the actual animations the character will use, like running and attacking, rather than judging it in a static pose where joint problems stay hidden.
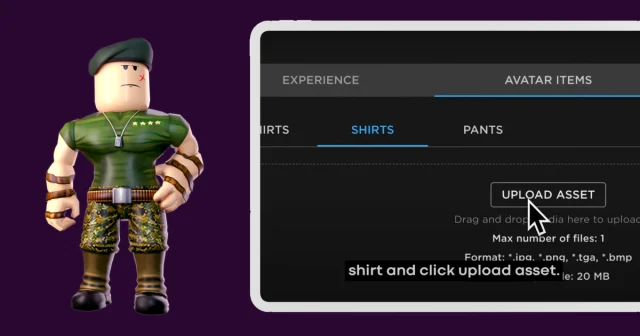
Is Roblox's built-in generation enough for game assets?
For items that live entirely inside Roblox, the built-in generation is convenient and well integrated. For multi-engine projects, custom rigs, vehicle physics, or assets you want to refine across retopology and texturing stages, a dedicated workflow gives you more control over the steps between generation and a shippable asset.