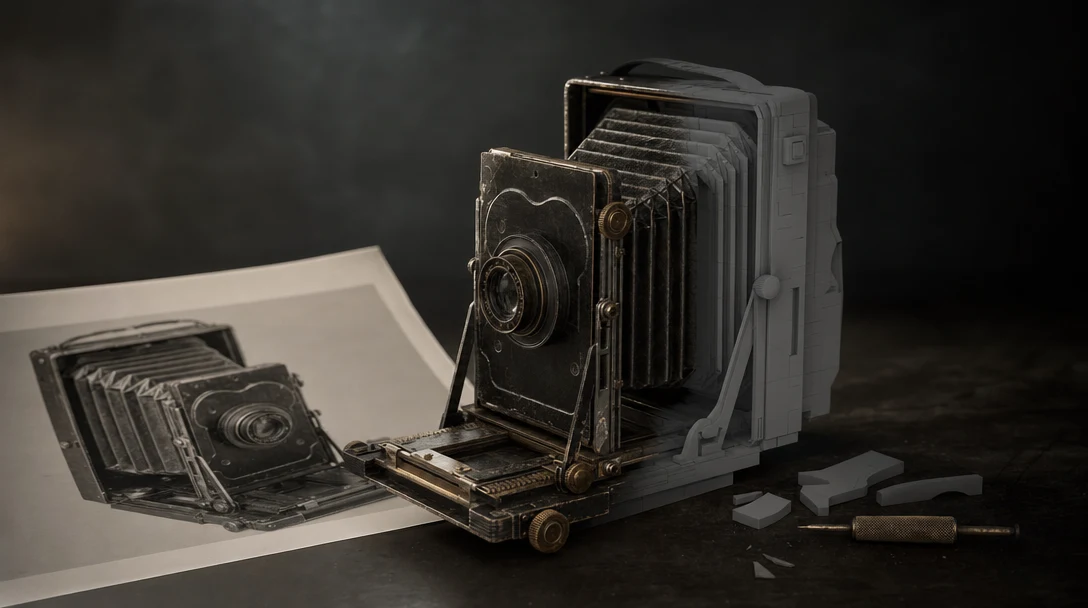
Quick Answer
To turn an image into a usable 3D model, treat the result as a reconstruction, not a deliverable. The model rebuilds what your photo showed and invents what it could not see, so the work is confirming the seen side against the reference, then repairing the inferred back, underside, and hidden detail. Then separate the merged materials, set real-world scale (reconstruction supplies none), and export in the format your destination needs. Generation takes seconds; usability comes from the repair loop after it. Judge the draft from the side the camera never saw, not the angle the tool shows you.
This guide works that loop in order, with the specific checks for single-image reconstruction, the numbers that matter, and a six-point sign-off before the asset enters a scene, engine, or print queue.
What the Reference Decides Before You Generate
The reference image is not just an input; it is a contract. Everything the camera saw, the model can reconstruct with confidence. Everything it could not see, the model has to invent. So the quality of your asset is largely decided before you ever press generate, by what your single frame does and does not contain.
Three properties of the reference matter most:
Silhouette legibility. A subject that reads clearly as a shape against its background reconstructs cleanly. A subject lost in clutter, shadow, or motion blur produces guessed geometry. Aim for one subject, in focus, on a plain or removable background, 1024 px or larger on the short edge.
Hidden-side predictability. A symmetric mug or a boxy crate has a back the model can infer correctly. A character holding a prop behind its back, or a machine with a complex rear panel, does not. If the unseen side carries meaning, one image cannot supply it; a side and back reference can.
Form-versus-texture honesty. Photographs flatten depth. Fine relief that lives in shadow, like stitching, embossing, or panel gaps, often arrives painted into the texture rather than built into the mesh. Knowing this in advance tells you whether to expect real geometry or a clever flat map.
Read your reference against those three before generating. It will tell you, ahead of time, which of the cleanup steps below you are signing up for.
The Common Trap: A Good Preview Is Not a Good Asset
Most image-to-3D results look impressive in the preview window. The object appears textured, shaped, and complete from the hero angle the tool chose to show you.
Then you rotate it.
That is where the problems surface. The back side is often weaker than the front because the model inferred it rather than observed it. Geometry can be lumpy or asymmetric. Detail that should be in the form gets painted flat into the texture instead. Material slots are merged into one. Scale is undefined, so the object imports at the wrong size in every engine.
For a social demo, the hero angle is enough. For production, the worst angle is what determines whether the asset survives. The rest of this guide is built around the gap between those two.
Closing the Seen-Versus-Inferred Gap
Image-to-3D cleanup is not a generic mesh pipeline. It is a specific repair job: confirming what the model observed, then fixing what it had to guess. Work the gap in that order.
Confirm the seen side first
Start at the angle your reference came from. This is the part the model had the most information about, so if it is wrong here, the reconstruction failed at its strongest point and is worth rejecting outright. Check that the silhouette matches the reference, that proportions track, and that visible material boundaries line up with the photo. A two-second match against the source image saves a long cleanup on a draft that was never close.
Hunt the inferred side deliberately
Now rotate to the back, underside, and any surface the camera never saw, because this is where single-view reconstruction breaks. Look specifically for the failure modes that come from inference rather than observation:
A back that is a smeared or symmetrized copy of the front.
Detail that lives only in the texture where the form should carry it (tilt the camera to a grazing angle and watch whether the relief moves with the light or stays painted flat).
Holes, floating fragments, or non-manifold edges where the model could not resolve geometry it never saw.
Drift in proportion on the hidden axis, so the object is thinner or deeper than the real subject.
If the inferred side carries meaning and it is wrong, do not sculpt blind. Regenerate with an added back or side reference; that fixes the root cause instead of hand-modeling a guess.
Separate the materials the photo merged
A photograph delivers one fused surface; production needs editable parts. Confirm distinct materials landed on separate slots, that albedo is clean with no baked shadows or highlights, and that resolution suits the target, often 2K for a hero prop and 1K or lower for background and streamed game assets. The practical test: if you cannot recolor the metal without recoloring the leather, the materials were not separated and the asset is not reusable.
Rebuild form and topology for the destination
Patch the inferred back, close holes, remove stray geometry, and correct asymmetry. If the asset is heading for rigging, animation, or LODs, retopologize here, because reconstructed meshes are typically dense triangle soup that does not deform or simplify well; you want quad topology with sensible edge loops. This is the step that turns a reconstruction into an asset.
Set scale and validate in context
Reconstruction has no sense of real-world size, so the object arrives with undefined scale and will import tiny or giant. Set real-world units, then place the asset next to a known reference and inside its target scene. An object that looks fine alone can fail against scene lighting, neighboring assets, and camera framing, because 3D is relational. Checking it in context is not optional polish; it is how you catch the failures isolation hides.
Export by destination, not habit
Pick the container from where the asset is going, not from muscle memory. The wrong format is a frequent reason a perfectly good mesh "breaks" in the next tool, losing materials, orientation, or rig data on the way.
Settings and Pre-Export Checklist
Use this table to set expectations and avoid the most common rejections at handoff.
Stage | What to check | Good target | Why it matters |
|---|---|---|---|
Reference | Subject clarity, resolution | One subject, 1024 px+, plain background | Garbage in, guessed-out; clutter confuses reconstruction |
Mesh | Watertight, manifold, symmetry | No holes, no floating bits | Holes and non-manifold edges break engines and prints |
Topology | Poly count, quad ratio | Game prop 1.5k–10k tris; quads for animation | Triangle soup blocks clean rigging and LODs |
Materials | Slot separation, baked light | Separate slots, flat albedo | Merged or baked materials cannot be edited downstream |
Textures | Map set, resolution | PBR set (albedo/normal/roughness/metallic), 1K–2K | Wrong maps or sizes hurt look and performance |
Scale | Real-world units | Object sized in meters | Wrong scale imports tiny or giant in every engine |
Export | Format vs destination | GLB/USD for web and real-time, FBX for DCC/engine | Wrong container loses materials or orientation |
For format specifics, the right container depends entirely on the destination, which is its own decision worth getting right.
Choosing an Export Format by Destination
Destination | Recommended format | Watch for |
|---|---|---|
Web / real-time viewer | GLB | Keep textures embedded; mind triangle budget |
Unity / Unreal | FBX or GLB | Check scale and axis on import |
Blender / DCC editing | FBX or OBJ | OBJ drops rig and animation data |
3D print | STL | Must be watertight and solid, not a hollow shell |
Film / USD pipeline | USD | Confirm material binding survives |
Texture handling differs by format, so always confirm whether maps travel embedded in the file or as separate sidecar files before you hand the asset off.
Where Single-Image Reconstruction Goes Wrong
These failures are specific to working from one photo. Most trace back to the model inferring something it could not observe.
Grading from the reference angle only. The front matches because the model saw it. Orbit and grade the inferred side, where the real errors live.
Texture faking silhouette. Relief that should be geometry arrives painted into the map. Catch it at a grazing camera angle, then regenerate with a sharper reference or extra angles rather than trusting the flat detail.
Symmetrized or smeared back. A single front view makes the model copy or blur the rear. If the back matters, add a back reference and regenerate; do not hand-model a guess.
Photographed lighting baked into albedo. The base color carries the shadows from your reference photo and breaks under every new light. Repaint or regenerate to a flat albedo.
One fused material slot. The photo merged surfaces the asset needs separate. Split by material before texturing, or generate with separation enabled.
Undefined scale. Reconstruction has no real-world units, so the object imports tiny or giant. Set units and validate against a 1 m cube or a 1.8 m figure.
Wrong export container. Match the format to the destination from the table above, then confirm textures and axis survive on import.
The Six-Point Reconstruction Sign-Off
Run this pass-or-fail check before the asset leaves your hands. Each test targets a specific way single-image reconstruction fails.
Reference-match test. Hold the draft beside the source photo at the original angle. Silhouette, proportion, and material boundaries should agree. If the seen side is off, reject the draft.
Inferred-side test. Spin 360 degrees and 180 degrees over the top. No smeared back, no missing geometry, no holes where the camera never looked.
Form-not-texture test. Tilt to a grazing angle under flat light. Real relief moves with the light; painted-in detail and baked shadows give themselves away.
Wireframe test. Toggle wireframe. Is the topology sane for the destination, or is it triangle noise that will not rig or LOD?
Scale test. Drop in a 1 m cube or a 1.8 m figure. The object should sit at believable real-world size.
In-context round-trip. Export, re-import into the target tool, and place it in the actual scene. Materials, textures, scale, orientation, and style should all survive and read correctly next to neighboring assets.
Pass all six and it is usable. Fail one and you know exactly which stage to return to, rather than regenerating blindly and hoping.
When a Single Image Is Enough (and When It Is Not)
A single reference is usually enough when the silhouette is simple, the hidden side is predictable, you are concepting or exploring early, you only need a starting point, or you can tolerate cleanup.
A single image is usually not enough when the back side matters, the object has moving parts, the asset needs accurate real-world dimensions, the model must match a real product exactly, or you need production output with minimal revision. In those cases, add reference angles up front or plan for the cleanup loop. This is exactly why serious image-to-3D should be treated as a workflow, not a magic upload button.
For ecommerce and product work specifically, the priority shifts to consistency: lock the product in 3D and generate angles, colorways, and contexts off that single source of truth so the product never drifts between shots. That is a different job than concepting, and it rewards getting the asset clean once and reusing it everywhere.
Why One Reference Is Worth Reconstructing Once
The whole point of image-to-3D is leverage: a single reference becomes a 3D source of truth you can render from any angle, recolor, and drop into any scene. That leverage only pays off if the reconstruction is clean once and the reference stays attached to it. The moment the draft gets exported to a converter and the reference is left behind, you lose the one thing that made the inferred side fixable, the original observation.
This is the image-to-3D-specific case for keeping the work on one canvas. In Customuse, the reference photo, the reconstructed mesh, the material edits, and the target scene all live together, so re-running the reconstruction with an added back angle, or branching three colorways off the same locked geometry, does not mean starting the import-export cycle over. Customuse uses providers like Meshy, Tripo, and Hunyuan as reconstruction nodes inside the graph rather than as the whole product, which is exactly what lets you swap the generator, keep the cleanup, and re-derive every downstream angle from the reference instead of redoing it by hand. For product and ecommerce work in particular, that is the difference between one clean asset reused across a catalog and a new guess every shoot.
FAQ
What is image to 3D?
Image to 3D is the process of reconstructing a 3D model from one or more 2D reference images using AI. The tool infers shape, surface, and often texture from the pixels, then outputs a mesh you can rotate, edit, and export. Single-view tools guess the unseen sides; multi-view tools reconstruct them more faithfully.
Can one image become a complete 3D model?
Often, yes, for simple objects with predictable hidden geometry. But the back, underside, and any concealed detail are inferred, not observed, so accuracy drops on complex or asymmetric subjects. For anything where the hidden side matters, supply extra reference angles or plan to fix the weak side after generation.
How accurate is the hidden side of an image-to-3D model?
As accurate as the model's guess, which is the core limitation of working from one view. Symmetric or simple subjects often come out fine because the rear is predictable. Asymmetric subjects, complex back panels, and anything occluded in the photo are where accuracy drops sharply, since the model is inventing rather than reconstructing. If the hidden side carries meaning, supply a back or side reference up front or plan to fix it after generation; do not trust an inferred rear by default.
What should I check before using an image-to-3D model?
Inspect the mesh from every angle for holes and missing back geometry, confirm materials are on separate slots with clean albedo, retopologize if it is heading to rigging or LODs, set real-world scale, choose the export format that matches your destination, and round-trip it into that tool to confirm everything survives. Run the six-point verification above before the asset leaves your hands.
Why does my image-to-3D model look great in the preview but bad in my engine?
Usually it is one of four things: the preview hid the weak back side, the scale was undefined so it imported tiny or huge, the materials merged or carried baked lighting that breaks under new lights, or the export container dropped textures and orientation. Work through the pre-export checklist and the round-trip test to isolate which one.