Quick Answer
An AI 3D asset pipeline is the repeatable, end-to-end process that turns a prompt, image, or reference into a 3D asset you can actually ship. It spans seven stages: define the use case, generate direction, inspect the mesh, prepare materials, optimize for the target, export and validate, then review in context. Generation is only the first stage. The other six decide whether the asset survives import into a game engine, a VFX shot, or a product render. Judge an AI 3D tool by the whole pipeline, not by its first preview.
In This Guide
What An AI 3D Asset Pipeline Actually Is
An AI 3D asset pipeline is the process that turns an idea, prompt, image, or reference into a usable 3D asset.
The important word is pipeline.
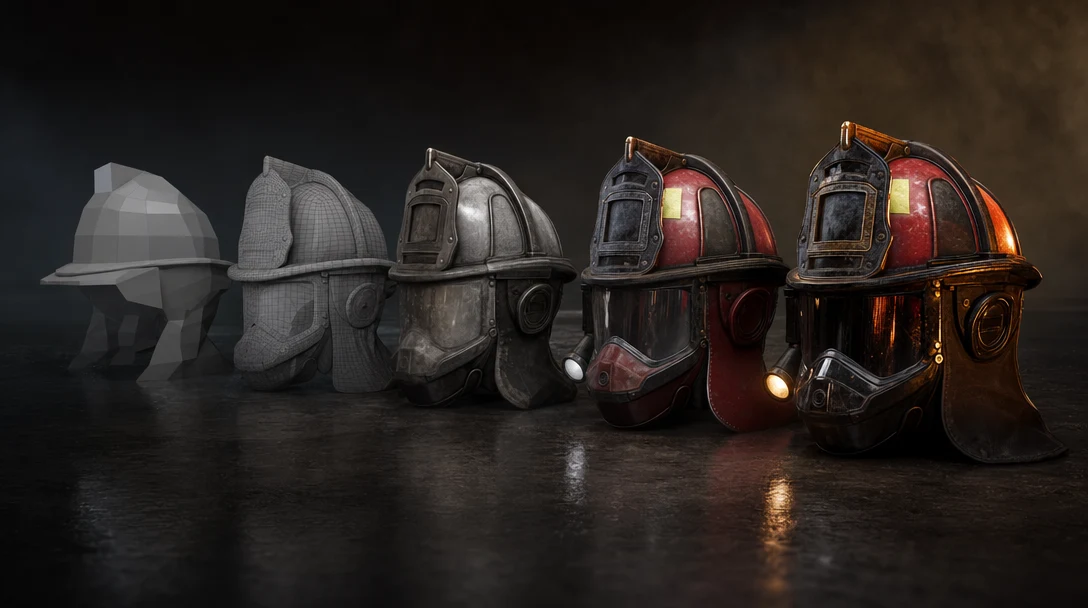
Generating the first mesh is only one step. A real asset may need inspection, cleanup, material work, optimization, export settings, review, and handoff before it can be used in a game, VFX shot, product scene, or interactive experience.
A pipeline is different from a generator in one specific way: a generator produces a candidate, while a pipeline produces a decision and a deliverable. The pipeline is what carries a candidate from "this looks plausible in a preview window" to "this imports clean into Unreal at the right scale with PBR maps and a sane pivot." That distance is where most of the real work — and most of the failures — live.
This is why AI 3D should not be judged only by the first output. It should be judged by whether the output can move through the rest of the workflow.
Why The Pipeline Matters More Than The Model
AI generation makes the start of 3D creation faster. But production value comes from what happens next.
A generated object may look good in a preview and still have problems:
Messy or triangle-soup topology.
Unclear or wrong scale.
Broken or baked-in materials.
Missing or overlapping UVs.
Too many polygons for the target.
Weak silhouette from off-axis angles.
No usable object hierarchy.
No clean export path.
Texture artifacts and seams.
Poor behavior under real lighting.
These issues do not mean AI 3D is useless. They mean teams need a workflow that separates exploration from production readiness.
The economic argument is straightforward. The first mesh might take thirty seconds to generate. Retopology, UV work, texture cleanup, and engine validation can take hours per asset if they happen by hand, every time, with no memory of what worked before. A pipeline is how you amortize that cost: you decide once what "ready" means for a given target, then run candidates through the same gates instead of re-litigating quality on every asset. A repeatable, node-based workflow turns that judgment into something a team can reuse and a teammate can audit.
The Distinct Jobs A Pipeline Has To Serve
There is no single AI 3D pipeline, because there is no single job. The same generated mesh can be perfect for one destination and unusable for another. Before optimizing anything, name the job.
Game-ready props and characters. Polygon budgets, LODs, clean UVs, baked normal maps, collision, correct pivots, and engine-specific export (FBX/GLB/USD). The asset has to perform at runtime, not just look good in a turntable.
VFX and cinematic assets. Higher fidelity, accurate scale relative to the shot, material behavior that holds under the show's lighting and camera moves, and continuity across shots. Polygon count matters less than how the surface reads in motion.
Product visualization. Accurate proportions, clean surfaces, consistent materials, and reusable scene setups so a catalog of products renders the same way every time.
Prototyping and concepting. Speed over polish. The asset only needs to communicate an idea, block out a scene, or test a silhouette. Here the first output may genuinely be enough.
Web and real-time 3D. Small file sizes, GLB delivery, compressed textures, and predictable load behavior across devices.
Each job changes which pipeline stages tighten and which relax. A background prop pipeline can skip retopology; a hero character pipeline cannot. Defining the job up front is what makes the rest of the workflow evaluable instead of guesswork.
The Seven Stages, In Detail
Stage 1: Define The Use Case
Start with the job the asset needs to do.
Is it a background prop, a hero object, a game-ready item, a VFX element, a product render, a cinematic reference, or a prototype?
That answer changes the pipeline.
A background asset may only need to look correct from one camera angle. A game prop may need clean topology, LODs, UVs, texture maps, collision, pivot placement, and engine-specific export settings. A VFX asset may need scale, shot-specific material behavior, and enough fidelity to hold up under camera movement. A product visualization asset may need more accurate proportions and material consistency.
The more specific the use case, the better the AI workflow can be evaluated.
Stage 2: Generate Direction
AI can help create the first version from text prompts, reference images, sketches, concept art, product references, existing models, or brand and style direction.
At this stage, the goal is direction, not perfection. A strong first generation should establish silhouette, form, proportions, mood, and the major visual idea. This is also where the choice between text-to-3D and image-to-3D matters: text is faster for blue-sky concepting, while image and reference input gives you far more control over a known target.
The mistake is treating this first output as final. In most professional workflows, the first output is a candidate, and a good pipeline generates several so you choose the best base instead of fighting the only one.
Stage 3: Inspect The Mesh
Before investing time in materials or exports, inspect the geometry. Ask:
Does the silhouette match the intent?
Are there holes or broken surfaces?
Is the mesh too dense, or too sparse?
Are important parts separated correctly?
Does the asset have interior noise or floating geometry?
Is the topology usable for the target, or does it need retopology?
This is where many AI workflows fail. They treat visual plausibility as production readiness. AI-generated meshes frequently arrive as a single dense, unstructured surface — fine for a static render, a problem the moment the asset needs to deform, animate, or hit a polygon budget.
A useful AI 3D workspace should make inspection easy. Creators should be able to rotate the asset, view it under lighting, compare versions side by side, and decide whether the model is ready to continue or needs another pass.
Stage 4: Prepare Materials
Materials often decide whether an AI-generated asset feels usable. Depending on the workflow, the asset may need base color, normal maps, roughness, metalness, alpha, emissive, consistent texel density, and correct material assignment — the standard PBR material set.
A common failure mode with generated assets is lighting baked into the base color. Shadows and highlights painted into the diffuse texture look convincing in the generator's fixed preview and then fall apart the moment you light the asset yourself. Clean PBR separation — color, roughness, normal, metalness as distinct maps — is what lets the asset respond to your scene instead of fighting it.
For stylized assets, material consistency matters as much as realism. For VFX and product work, lighting behavior matters. For games, texture size and performance matter. The best test is scene context: a material that looks good in a thumbnail can fail under a different light, camera, or environment.
Stage 5: Optimize For The Target
Optimization is not one universal step. It depends on the destination.
For a game asset, you may need a lower polygon count, LODs, texture compression, collision setup, pivot placement, scale checks, and engine-specific export settings. For a VFX or cinematic asset, you may prioritize detail, material control, and shot consistency. For product visualization, you may prioritize accurate proportions, clean surfaces, and reusable scene setups.
The same generated asset can require very different preparation depending on where it is going. This is the stage most often skipped by tools that stop at generation — and the one that most determines whether the asset is a finished deliverable or just a starting point.
Stage 6: Export And Validate
Export is part of the pipeline, not an afterthought. Validate file format, scale, axes, materials, texture paths, mesh hierarchy, naming, animation data if relevant, and import behavior in the actual target tool.
GLB, FBX, OBJ, STL, and USD each carry different assumptions about what data travels with the file:
Format | Best for | Carries | Watch out for |
|---|---|---|---|
GLB | Web, real-time, compact delivery | Mesh, PBR materials, animation, embedded textures | Less common in legacy DCC pipelines |
FBX | Game engines, animation pipelines | Mesh, rigs, animation, hierarchy | Proprietary; material/texture path quirks |
OBJ | Simple static handoff, wide support | Mesh, UVs, basic materials (MTL) | No animation, no rig, no PBR by default |
USD | Studio pipelines, scene assembly | Mesh, materials, scene hierarchy, layering | Heavier; tooling support still maturing |
STL | 3D printing | Raw geometry only | No color, UVs, or materials |
If the asset looks good in the generator but breaks in Blender, Unity, or Unreal Engine, the pipeline is not finished. Choosing the right format — see GLB vs FBX for the most common decision — is itself a pipeline step, not a dropdown afterthought.
Stage 7: Review In Context
The final test is not whether the asset looks good in a preview window. It is whether the asset works in context.
Place it in the scene. Light it. Rotate the camera. Test it next to other assets at the same scale. Import it into the engine or DCC tool. Ask whether it solves the original job from Stage 1.
This review step is especially important for AI-generated assets, because AI can create convincing surface impressions that hide structural problems. The preview is optimized to look good; the scene is optimized to expose anything that is not.
How To Choose A Pipeline: A Decision Matrix
Not every project needs all seven stages applied with equal rigor. Use the target to decide where to invest. The matrix below maps common destinations to which stages are critical, optional, or skippable.
Target | Mesh inspection | Retopology | UV + PBR materials | Optimization (LODs/budget) | Export rigor |
|---|---|---|---|---|---|
Background game prop | Required | Optional | Required | Required | High (engine) |
Hero game character | Required | Required | Required | Required | High (engine + rig) |
VFX shot element | Required | Often required | Required | Shot-dependent | High (USD/FBX) |
Product render | Required | Optional | Required | Low | Medium (GLB/USD) |
Web/real-time viewer | Required | Optional | Required | Required | High (GLB) |
Concept/blockout | Light | Skip | Skip | Skip | Low |
3D print | Required (watertight) | Skip | Skip | Skip | Medium (STL) |
Read the matrix as a budgeting tool. The more "Required" cells in a row, the more the pipeline — not the generator — determines success, and the more value there is in a workspace that can run those steps in one place and remember the recipe for next time.
Generation Versus Production: Where Workflows Win
There is a meaningful difference between a model that generates and a system that produces.
Raw generation quality is a real and improving frontier. Tools like Meshy, Tripo, and Hunyuan are genuinely good at turning a prompt or image into a plausible mesh, and on raw first-mesh quality any of them may beat a given alternative on a given prompt. That is the model layer, and it is getting better fast.
But production value comes from the workflow layer: deciding which candidate is worth keeping, preparing it correctly for its target, preserving the steps so they can be repeated, and handing the result to a teammate or an engine cleanly. Models create possibility; workflows create production.
This is the lens through which Customuse is best understood. The valuable product is not only a generator — it is a workspace where generation, inspection, material work, optimization, and export sit together in one canvas. In the Nodes Editor, each stage of the pipeline becomes a visible node, and the providers above (Meshy, Tripo, Hunyuan, and others) become nodes inside a larger graph rather than separate destinations you copy files between. AI agents can assemble those graphs, real-time multiplayer lets a team review candidates together, and the workflow itself becomes reusable project memory instead of a one-off. That is how a repeatable, node-based workflow turns scattered tool-hopping into an actual pipeline — without claiming any single model is best at raw generation in every case.
A Realistic End-To-End Example
Consider a small game studio that needs a weathered wooden crate for an interactive level in Unreal Engine.
Define the use case. It is a mid-distance interactive prop. Target budget is under 3,000 triangles, it needs collision, and it must read clearly when the player walks past at speed.
Generate direction. The artist feeds a reference photo of a real crate into an image-to-3D node and generates four candidates. Two have decent proportions; one has the cleanest silhouette and the most even surface. They pick that one as the base.
Inspect the mesh. The base comes in at 90,000 triangles as a single dense surface, with the lid fused to the body. Plausible-looking, not game-ready. The studio flags it for retopology and separation.
Prepare materials. They generate PBR maps — base color without baked shadows, normal, roughness — at 2K, then confirm the wood grain reads correctly under the level's directional light rather than the generator's flat preview.
Optimize for the target. Retopologized to ~2,400 triangles, two LODs added, textures compressed, collision box added, pivot moved to the base so it sits on the floor correctly.
Export and validate. Exported as FBX with the rig-free hierarchy intact, materials and texture paths checked, scale set to centimeters to match Unreal. A test import confirms the crate lands at the right size with maps connected.
Review in context. Dropped into the actual level, lit with the level's lighting, viewed at gameplay distance and up close. It holds. The crate is done — and the node graph that produced it is saved, so the next twelve props in the set run through the same recipe instead of starting from zero.
The first mesh took under a minute. Everything that made it shippable — and reusable — happened in the six stages after.
Practical Pipeline Checklist
Before accepting an AI 3D asset, ask:
What is the asset for, and which tool or engine does it need to enter?
Does the mesh hold up from the angles that matter for this job?
Are important parts separated correctly, with a sane hierarchy?
Do the materials behave under real lighting, with no baked-in shadows?
Does it need retopology, UV work, or texture cleanup?
Does it need optimization — polygon budget, LODs, compression, collision?
Can it be exported cleanly in the right format, at the right scale and axes?
Did it survive a real in-context review, not just a preview?
Can another team member understand and rerun the workflow?
This checklist is simple, but it prevents the biggest mistake in AI 3D: confusing a generated preview with production work. For a deeper gated version, see the production-ready AI 3D asset checklist.
FAQ
What is an AI 3D asset pipeline?
It is the end-to-end process of creating, inspecting, cleaning, optimizing, exporting, and reviewing AI-generated 3D assets. It typically has seven stages — define the use case, generate, inspect, prepare materials, optimize, export and validate, review in context — and generation is only the first one.
Is a generated 3D model production-ready?
Sometimes, but not automatically. Production readiness depends on topology, materials, scale, optimization, export settings, and the target workflow. A model can be perfect for a concept blockout and unusable as a rigged hero character without retopology and clean UVs. Always inspect before you commit time to materials or export.
What is the best format for AI 3D assets?
It depends on the use case. GLB is strong for web, real-time, and compact previews; FBX is common in animation and game engine workflows; OBJ is simple and widely supported but carries no rig or animation; USD suits studio scene-assembly pipelines; and STL is for 3D printing geometry only. Match the format to the destination and validate the import before calling it done.
How many AI 3D candidates should I generate before committing?
For anything beyond a throwaway blockout, generate several and pick the cleanest base rather than fighting the first result. A candidate with a strong silhouette and even surface saves far more time downstream than one you have to heavily repair. A pipeline that makes side-by-side comparison easy turns this into a quick decision instead of a gamble.
How is an AI 3D pipeline different from just using a generator?
A generator produces a candidate mesh. A pipeline produces a finished, validated deliverable and — ideally — a repeatable recipe. The difference is the six stages after generation: inspection, materials, optimization, export, validation, and in-context review. Teams that only have a generator end up doing those steps manually and inconsistently; teams with a workflow layer run them as reusable, auditable steps.